- Hop on down to your local craft or hardware store.
- I recommend starting light, inexpensive, and easy to work with. 20 gauge copper, even the silver toned stuff in the beading section is a good way to cut your teeth.
- You'll need two pairs of pliers sutable for the size wire you're working with. Small flat nose pliers work perfectly for small wire. Heavy gauge wire calls for maybe a six or eight inch pair of linesman pliers. Remember that pliers with teeth will scratch soft metal, but go with what you can find easily. This is just practice.
- Side cutting pliers (wire cutters) the jaws will be sortof football shaped and sharpened. Heavy gauge will require something like mini-bolt cutters.
- A mandrel. Don't ask the guys at the hardware store for a mandrel, they'll look at you funny. What you're looking for is something to wrap wire around to make a spring. Pen barrels, metal rods, knitting needles, even a screwdriver.
- Gloves, please wear gloves, heavy work gloves.
- Eye protection. Flying metal can seriously ruin your chances of retaining binocular vision.
Now pull out some of that wire and wrap it around that mandrel. Learned a new word while you're at it. Wrap it tight and as consistantly as you can. You'll find a small hole drilled crosswise through your mandrel serves perfectly to secure the starting end of your coil. Turn the mandrel, it's easier than flopping wire around everywhere.

This is important: Always release the tension on a coiled wire slowly. You don't want to see the kinds of nasty cuts it could cause if you just let go. All metals will have a certian amount of springback, the percentage of bendyness they resist as it tries to return to it's orginal shape. Over a long distance like a length of wire, this means that free end can turn into a circular saw. So hold the free end of your wire tight, and carefully turn your mandrel the opposite direction. You don't really have to apply any more pressure than you need to keep it from spinning back on it's own. Once it's stopped working against you, you're good to let go. Another reason I suggested light copper over a heavy steel to start with, it's much easier to manage without building a more complex coiling rig.
So your spring, coil, worm, whatever you want to call it, is done, you've carfully eased the tension off the wire. Cut off the spool end then the secured end with your angle cutters and slide the coil off. All you have to do is clip each turn lengthwise from the coil. making short springs of only one turn, essentially.

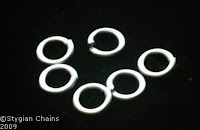
Now you have rings. After a short break, we'll move on to Step Two: Weaving Chainmail. Where I'll talk about opening and closing rings properly, and introducing you to your first chainmail weave.
Have fun,
Charon


No comments:
Post a Comment